먼저 FarPoint Technologies' Spread 6를 설치하셔야 이 예제를 해보실 수 있습니다.
ActiveX 작성한 IDE 툴로는 VB 6.0을 이용하였습니다.
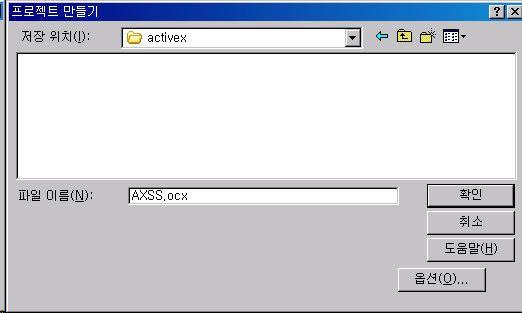
먼저 VB 6.0의 새프로젝트를 열고 'ActiveX 사용자 정의 컨트롤' 프로젝트를 만듭니다.
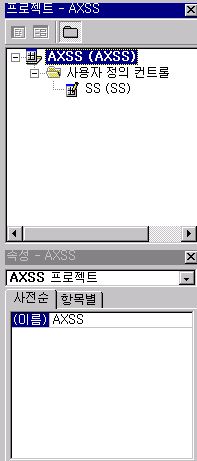
프로젝트 이름과 컨트롤의 이름을 다음과 같이 작성한다.
먼저 프로젝트명과 컨트롤의 속성에서 이름을 각각 AXSS와 SS로 지정하였다.
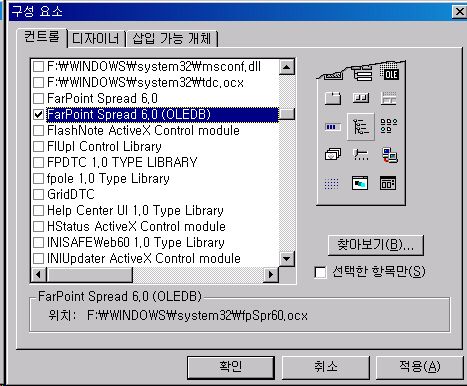
VB 6.0의 도구모음에서 '마우스 우클릭'을 해서 '구성 요소'를 선택해 위와같이 Spread 6 'FarPoint Spread(OLEDB)' 를 추가해주자.
VB 6.0의 도구모음에서 '마우스 우클릭'을 해서 '구성 요소'를 선택해 위와같이 Spread 6 'FarPoint Spread(OLEDB)' 를 추가해주자.
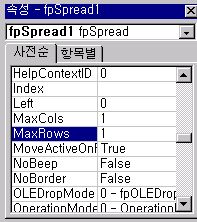
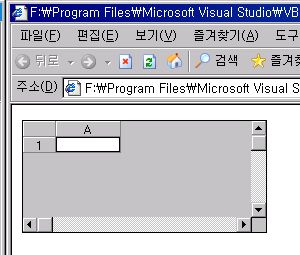
'MaxCols'와 'MaxRows'를 각각 1로 설정
등록된 버튼 2개중 좌측에 있는 버튼을 클릭해서 컨트롤 패널위에 fpSpread를 끌어다 놓고,
속성 중 'MaxCols'와 'MaxRows'를 각각 1로 설정해서 한칸만 나타나도록 설정하였다.
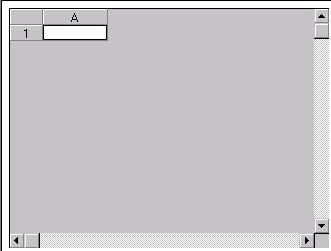
화면에 1 * 1의 스프레드가 뜨는 것을 확인할 수 있다.
위와 같이 화면에 1 * 1의 스프레드가 뜨는 것을 확인할 수 있다.
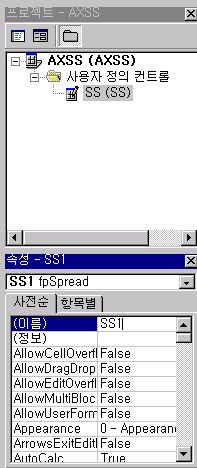
Spread 이름을 'SS1'으로 변경하였다.
추가된 스프레드의 이름은 'SS1' 이라고 이름을 변경해 주었다.
프로젝트에서 컨트롤에 우클릭해서 '코드보기'를 클릭해 코드보기 모드로 들어가서 다음 파일의 소스 코드를 입력한다.
코드를 다 입력하고 나면
압축파일의 압축을 풀고, 파일들을 프로젝트의 폴더로 옮겨서 프로젝트에서 기존 파일을 추가해서 SubMain.vb 파일을 프로젝트에 추가시키고,
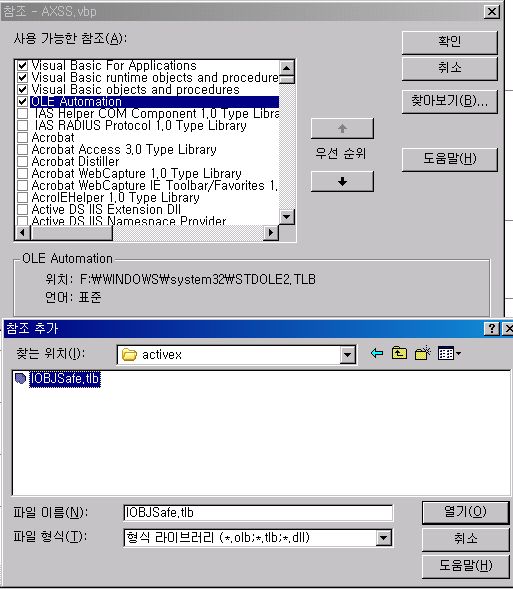
프로젝트 메뉴의 '참조'를 클릭해 tlb 파일을 추가해 보자
프로젝트 메뉴의 '참조'를 클릭해 tlb 파일을 추가해 보자
참조가 추가된 모습 - VB6 - IObjectSafety Interface가 보일 것이다.
참조가 추가된 모습 - VB6 - IObjectSafety Interface가 보일 것이다.
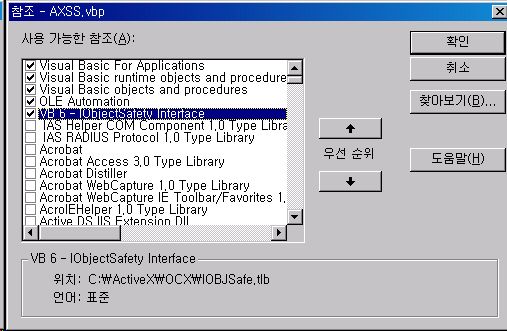
프로젝트 속성 메뉴에 들어가서 시작 개체를 'Sub Main'으로 바꿔준다
프로젝트 속성 메뉴에 들어가서 시작 개체를 'Sub Main'으로 바꿔준다.
이제 단축키 F5를 눌러 브라우져가 실행되는 것을 확인해보자..
다음과 같이 브라우져 상에서도 컨트롤이 뜨는 것을 확인할 수 있다.
우선 이렇게 해서 ActiveX가 되는것을 확인했으니 반은 다 된샘이 아닐까?
그렇다고..
창을 닫아 버리고 끝까지 보지 않으면 -_ -;; ActiveX를 제대로 배포하거나 사용한다고 할 수 없다.
File 메뉴의 OCX 만들기를 클릭해서 해당 폴더에 ocx파일을 만들어보자
먼저 File 메뉴의 OCX 만들기를 클릭해서 해당 폴더에 ocx파일을 만들어보자.
ocx 파일이 만들어졌으면 이 ocx 파일을 가지고 배포 패키지를 만들어야 한다.
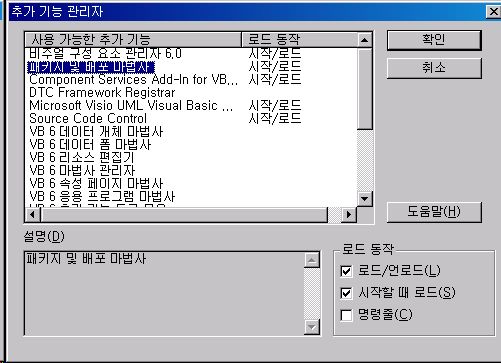
추가 기능 관리자 > 패키지 및 배포 마법사의 '로드/언로드', '시작할 때 로드'를 체크해준다.
추가 기능 관리자 > 패키지 및 배포 마법사의 '로드/언로드', '시작할 때 로드'를 체크해준다.
이제 '패키지 및 배포 마법사' 메뉴가 활성화 되어있을 것이다.
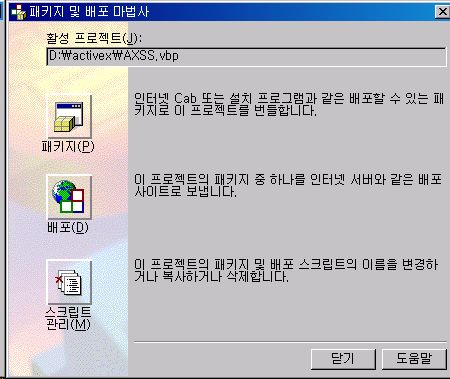
패키지 및 배포 마법사
패키지 메뉴를 클릭한다.

패키지 형식은 '인터넷 패키지'를 선택한다.
패키지 형식은 '인터넷 패키지'를 선택한다.
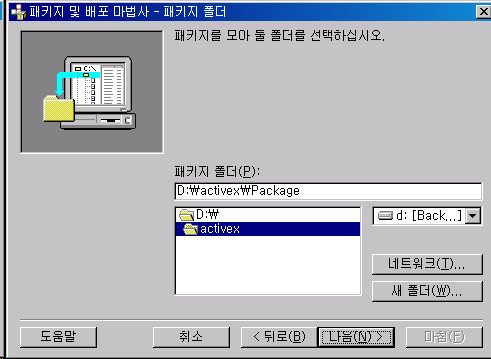
패키지 폴더는 그냥 다음을 눌러서 넘어가면 'Package' 폴더가 생성되는걸 확인한다.
패키지 폴더는 그냥 다음을 눌러서 넘어가면 'Package' 폴더가 생성되는걸 확인한다.
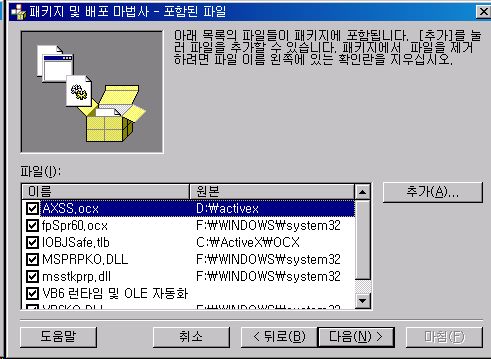
다음으로 넘어오면 종속성 창이 뜨는데 체크를 전부 하지 말고 다음으로 넘어가자
다음으로 넘어오면 종속성 창이 뜨는데 체크를 전부 하지 말고 다음으로 넘어가자.
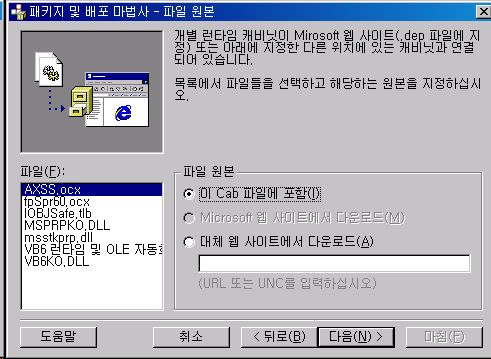
'파일 원본' 창에서 '이 Cab 파일에 포함'을 체크하고 다음으로 넘어가자.
'파일 원본' 창에서 '이 Cab 파일에 포함'을 체크하고 다음으로 넘어가자.
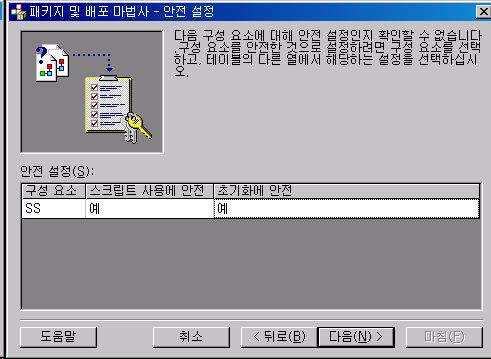
'안전 설정'에서 '스크립트 사용에 안전'과 '초기화에 안전' 둘다 '예'로 변경하자.
'안전 설정'에서 '스크립트 사용에 안전'과 '초기화에 안전' 둘다 '예'로 변경하자.
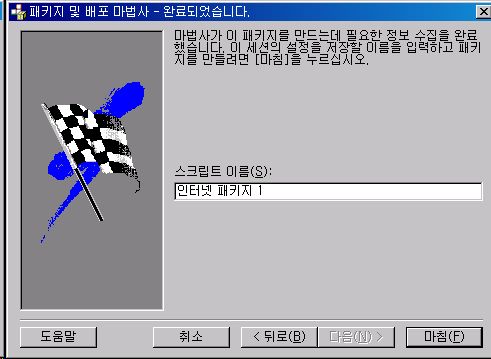
'완료'창이 떴으니 이제 패키지는 만들어 졌다고 보면 된다.
'완료'창이 떴으니 이제 패키지는 만들어 졌다고 보면 된다.
기본으로 설정된 '인터넷 패키지 1'으로 하고, *.cab 파일이 생성된 것을 확인하자.
위 압축 파일을 프로젝트 폴더에 받아 압축을 풀면 2개의 폴더가 생성된다.
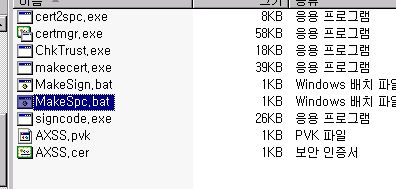
versign 폴더에서 *.bat 파일이 2개 있는데 편집모드로 열어보면 이름을 바꿀 수 있다.
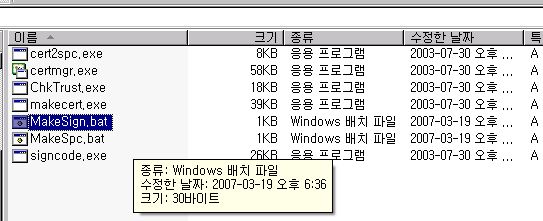
Versign
먼저 MakeSign.bat 파일을 실행하면,
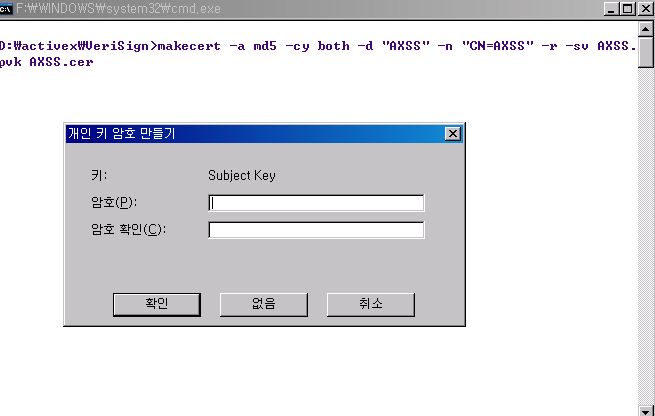
암호 만들기
위와 같이 암호를 설정할 수 있다.
암호는 까먹지 않도록 잘 기억하고, 암호를 입력한다.
파일이 AXSS로 2개가 형성된 것을 볼 수 있고,
MakeSpc.bat 파일을 마저 실행하면,
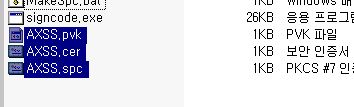
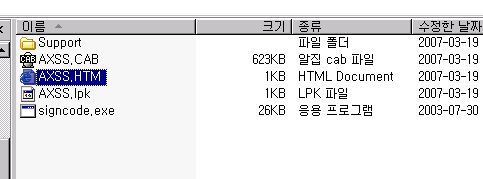
파일 3개
다음과 같이 총 3개의 파일을 볼 수 있다.
압축을 해제할때 있던 다른 폴더를 가보면 *.exe 실행파일을 실행해보자.
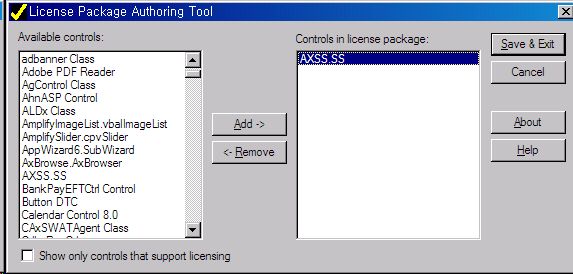
아까 빌드를 했으니 아마 위 그림과 같이 AXSS.SS 가 좌측에 추가된 것을 볼 수 있다.
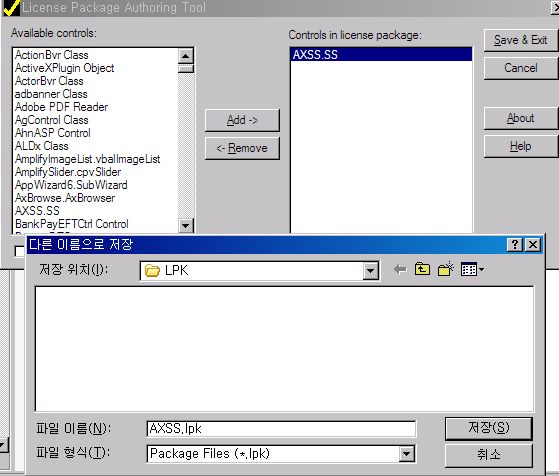
추가 버튼을 눌러 오른쪽에 나타나도록 하고 'Save & Exit' 버튼을 눌러서,
다음과 같이 lpk 파일을 저장한다.
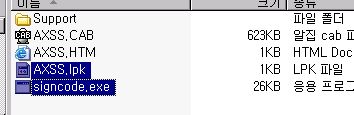
lpk 파일과 signcode.exe 파일 복사
만들어진 lpk파일과 signcode.exe 파일을 cab파일이 만들어진 폴더로 복사해서 같은 폴더에 위치시키도록 하자.
signcode.exe 실행
signcode.exe 실행하면 다음과 같은 창이 뜬다. 다음을 클릭한다.
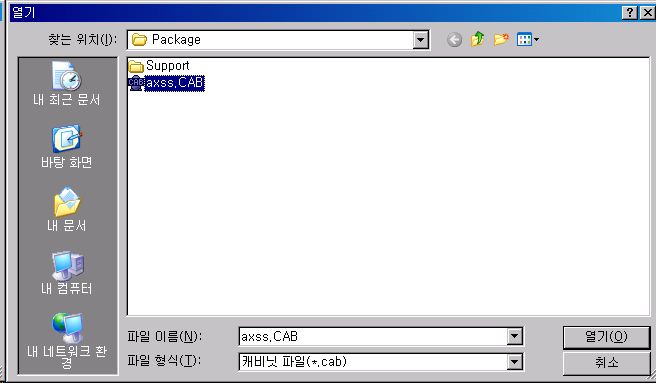
확장자를 cab으로 변경하고 cab파일을 선택한다.
확장자를 cab으로 변경하고 cab파일을 선택한다.
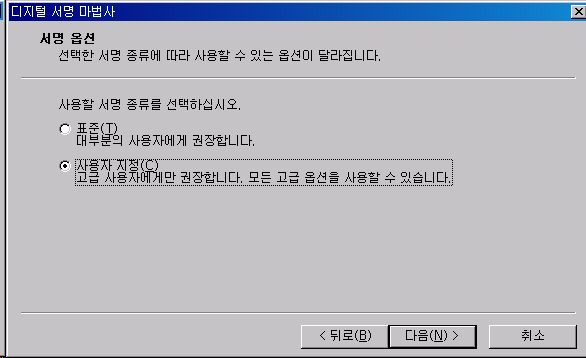
사용자 지정을 클릭하고 다음을 넘어간다.
사용자 지정을 클릭하고 다음을 넘어간다.
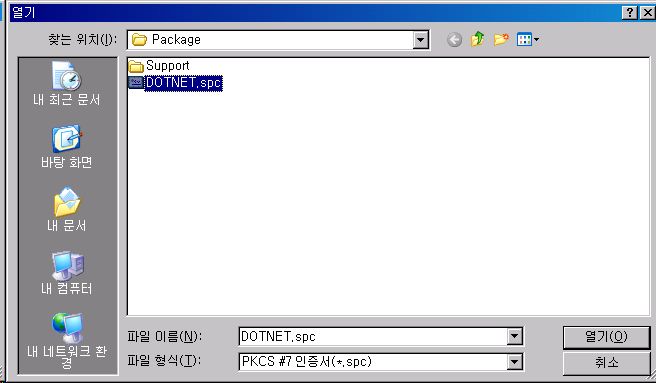
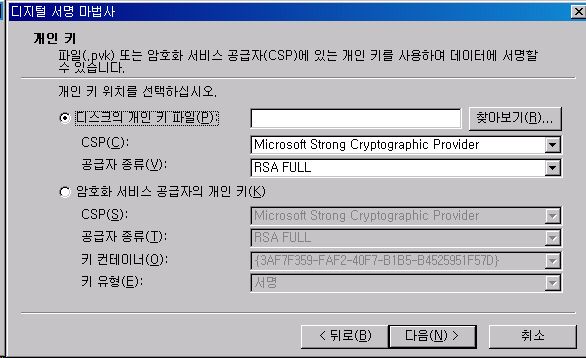
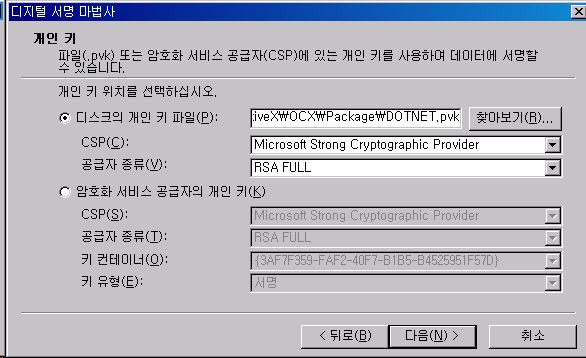
인증서 파일을 선택한다.
인증서 파일을 선택한다.
찾아보기를 클릭해서 개인키 파일을 다음과 같이 설정한다.
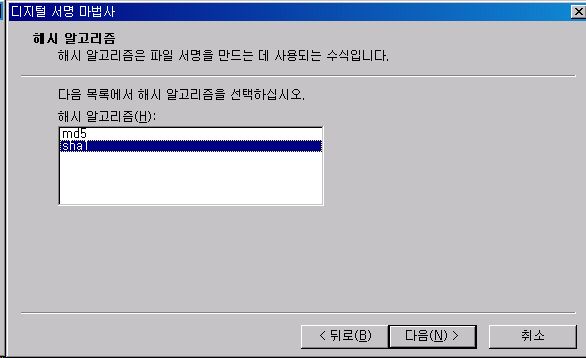
해시 알고리즘
해시 알고리즘은 'sha1'을 골라주고 다음을 클릭한다.
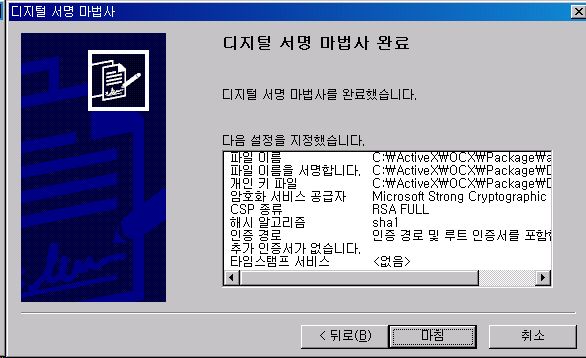
인증 완료.
이제 cab파일의 디지털 인증은 완료되었다. 마침을 클릭하자.
위와 같이 아름다운(?) 메시지를 확인할 수 있다.
이제 위에 생성된 cab 파일을 이용해서 activex를 자바스크립트와 HTML 컨트롤을 이용해서 제어하는 코드를 작성해보자.
기본적으로 text 에디터로 html 파일을 열어보면,
위 텍스트 파일처럼 작성이 되어 있을 것이다.
이제 우리는 HEAD 테그 엘레먼트아래 SCRIPT 테그 엘레먼트를 추가해서 ACTIVEX 제어코드와 HTML INPUT 컨트롤로 TEXT, BUTTON을 각각 2개 추가하고,
ACTIVEX에 이미 작성되어 있던 메소드를 호출해 볼 것이다.
위 HTML 코드를 다음 코드로 변경 시키도록 하자.
(OBJECT 테그에 있는 내용은 각자 작성된 HTML 코드로 이용한다.)
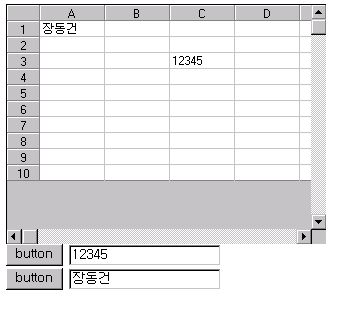
이제 다음과 같이 웹페이지 안에 ACTIVEX 컨트롤이 뜨는 것을 확인 할 수 있고,
위쪽의 텍스트 상자에 값을 입력하고 첫번째 버튼을 클릭하면 Spread 안에 값이 입력되고,
스프레드의 1, 1 위치에 값을 입력한 후 두번째 버튼을 클릭하면 Spread 안의 값을 테그트 상자에 가져오는 것을 확인 할 수 있다.
본 강좌에서 사용한 전체 파일의 압축 파일은 아래 파일을 다운받으면 볼 수 있다.
이상으로 FarPoint Spread를 이용한 ActiveX 페이지와 스크립트 제어에 대한 강좌를 마친다.

이
저작물은
크리에이티브 커먼즈 코리아 저작자표시-비영리-동일조건변경허락 2.0 대한민국 라이센스에 따라 이용하실 수 있습니다.

 RURU_test_Mail_GmailSmtp.zip
.gif)
 invalid-file
 invalid-file